Open Street Map: The Wikipedia for maps
OpenStreetMap (OSM) is a project whose aim is to create a free map of the world. We collect data about streets, rivers, buildings, land use and everything that can be seen on maps. Because we collect the data ourselves and don't copy from existing maps, the project has the intellectual rights for them. OpenStreetMap data may be used freely by everyone.
The main page of OpenStreetMap is OpenStreetMap.org. Die labelling of ways, points and areas are in English and mainly British (not US-american) notions are used, as the British mappers were among the most active in the time the project was founded, and they coined many of the OSM notions.
Isn't it unrealistic to attempt, as an amateur in one's spare time,
to create a map of the entire world?
The same can be asked about Wikipedia and see what it has grown into:
A free encyclopedia that can be compared to
Encyclopaedia Britannica
or the German Brockhaus.
Every OSM mapper just maps the area he is interested in. In big cities like Wien and Hamburg, naturally more data get collected than in the countryside. But OSM has more than 100000 users worldwide and the numbers are growing, the tools (mainly GPS gadgets) are getting cheaper (almost every smartphone comes with GPS nowadays), while the Earths surface is limited. So it can be assumed that all interesting areas will be mapped some day.
In some regions the OSM map is already more detailed than, for instance, Google Maps.
A big advantage of Google Maps, however, are aerial and satellite imaging. OSM has nothing like it (yet). There are free Landsat images, but they are very coarse. So it was excitiong for the OSM community when the Microsoft Bing Team announced that Microsoft would be providing access to the Bing Aerial Imagery for use in the OpenStreetMap project. As a result, now we can use Bing imagery in OSM tools like JOSM to exactly see and map, for instance, where there is the boundary between a forest and a meadow, or where a river flows along, and so on. Previously you had to walk along that boundary if you wanted to be exact. The imagery can best be used for regions difficult to reach, like those meadow/forest or farmland/forest boundaries, while it doesn't show small structures like forest paths, which in turn can be easily and pleasantly reached on foot or with the bicycle. So mapping on the ground and the imagery almost ideally complement one another.
An interesting comparison of OSM with other Internet maps is provided by http://sautter.com/map/
As an example for the progress of OSM, here is a comparison of the map of a rural area from 2009-02-11 and from 2009-05-18:
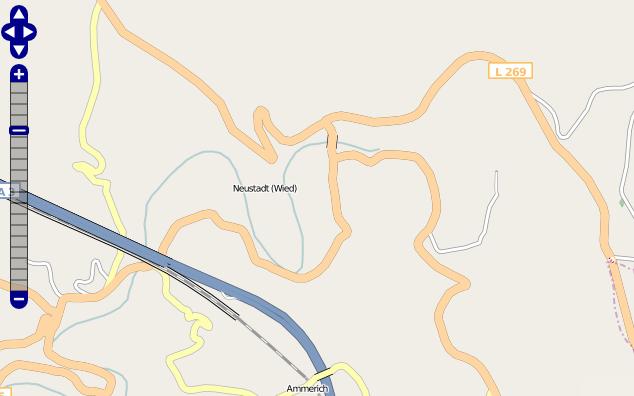 11.2.2009 |
 18.5.2009 |
The forest areas that had been added in this time come from Landsat imagery. The rest has been mapped by me with a GPS gadget and a digital camera. Of course, progress did not stop there, other mappers grew interested in the area and added details, and me too, I am still active. This is just to illustrate that single enthusiastic mappers can well add much detail to the map in their region.
How to create OSM maps
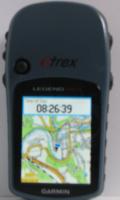 | The procedure described here is the usual approach to map for OSM. You need a GPS gadget and a digital camera. I use a Garmin etrex Legend HCx, a quite rigged GPS gadget which is widely used for hiking and mapping. It cost about 160 EUR at the beginning of 2009. As a digital camera you can use any camera from about 2 megapixels. These are not expensive, either. For the data processing at home you need a PC with an Internet connection. Some basic computer skills are required, too. You need to know what files and directories are, how to install programs, and so on. For the method described here you also need Java. Sorry, but the following still needs to be translated. Before starting you mapping tour you switch on the GPS gadget and let it find the satellite positions. Some preparations are needed, but only once, not before each tour:
|
The camera's memory card should also have a sufficient capacity (1 GB should be enough for one-day tour), and spare (rechargeable) batteries for the camera and the GPS gadget could come in handy.
Then you can start, preferably on foot or by bike. In the car you must concentrate on the traffic too much, you can't stop wherever you want, and many ways, e.g. hiking paths are not accessible by car.
So let's assume you are on tour by bike or on foot. Everywhere you pass, you record all interesting things with the camera: street names and types, land use (farmland, forest, residential, industrial etc.), rivers and bridges, amenities like benches, post boxes, hoiuse numbers, shops (name, type, address, ...) and so on; you can go into detail as deeply as you wish and you deem reasonable. Meanwhile the GPS gadget continuously records your position along with the time. It you set it up to do so, it records latitude and longitude every single second with an accuracy of about 8 meters. You only need to have it with you, switched on. You need not handle it in any way during your trip. For the accuracy it is useful if it has a clear view of the sky.
After the tour you return with an abundance of GPS data and photos. These are loaded to the PC and processed with a software such as JOSM. The real work begins now, up to now it was just a walk. For this part you need some basic PC skills. Also, you should know the OSM terminology. More detailed instructions can be found in the Internet. In fact, I got all my knowledge about OSM from the Internet. Apart from the Internet, you really need no other information sources. JOSM can associate photos with points on the track. For this to work, the synchronization photo is needed. In JOSM, you first download from OSM the data for the region you are mapping. So you have a semi-finished map from OSM, and your own track and photos. The display of JOSM is quite different from a normal map. (It resembles a pattern for sewing rather than a map.) That's because it is meant for editing rather than viewing the map. Ways are represented as points joined by lines. These points can be selected with the mouse and then be moved or otherwise manipulated. From the photos you can see what type of ways or streets there are, what are the street names etc., and enter these data in JOSM. After that, the data are uploaded to OSM. Some time later (one or two days), the OSM server processes the data automatically. It generates a map that is free to use for everyone in the Internet. (In fact, you can also generate this map at home yourself, but that is quite complicated.) Maps for special devices such as Garmin GPS devices are generated from these data as well. This way (see below) your self-created map gets on the device with which (part of) it has been created. | 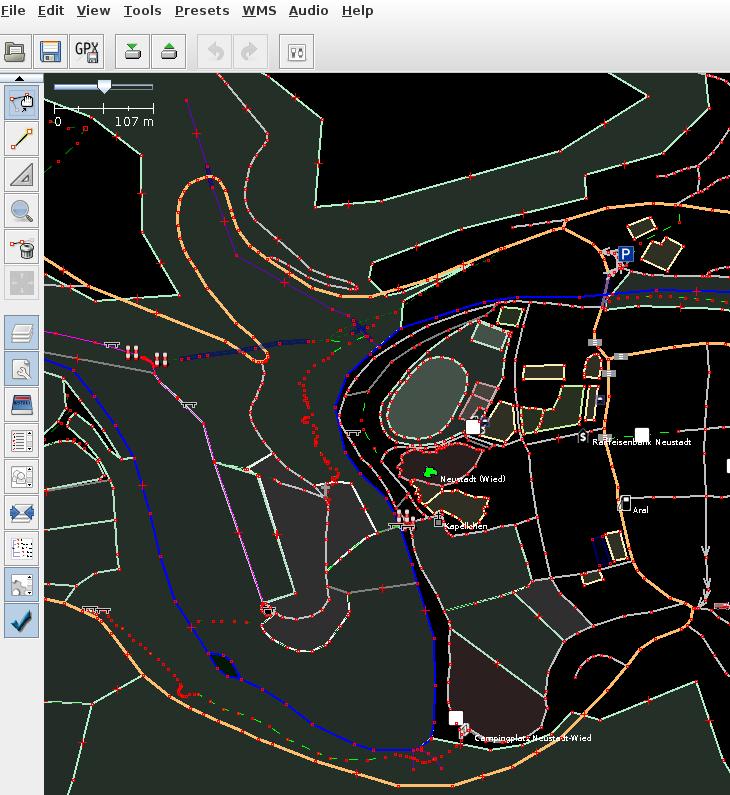 |
Using a GPS gadget for navigation
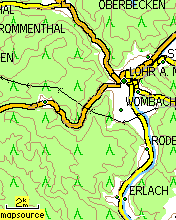 |
Of course the gadget can also be used to navigate unknown terrain. Maps from OSM can be loaded on the gadget (and commercial maps as well). The image to the right shows a Garmin GPS gadget with a section of a topographic map Garmin gadgets, downloaded from http://www.kleineisel.de/ralf/gps/garmin/. There you can also find further screenshots (see left) and instructions for installation. Further sources: http://www.christian-steimel.de/vektor-karte_von_deutschland.htm and http://wiki.openstreetmap.org/wiki/OSM_Map_On_Garmin. The OpenStreetMap Wiki is one of the riches sources of information and links about OSM. | |